**PSA to all coeliac and gluten-free subscribers, this week’s newsletter is rather bread heavy. Proceed with caution…*
Bread is love. Bread is life.
Just last night, I had a couple of special friends over for dinner. After a brief moment of consternation in trying to plan what I would cook, I realised that it was the perfect opportunity to open a VERY special bottle of extra virgin olive oil, Aotearoa-made and grown, pressed from the trees of my friend’s whānau in Mangapai. It felt criminal to use in the main course dishes, but it provided the perfect inspiration for how to bookend the meal.
At the close, its fresh greenness drizzled over a simple lemon and vanilla panna cotta with a sprinkling of thyme & almond crumble. And to start, swirls of hummus and whipped yoghurt in which the olive oil was poured and pooled; glistening under the dining room light. But who would dive and dip into its golden depths?
The flour was promptly scattered on the dining table and before long my friends were put to work, rolling out a quick yoghurt-based flatbread dough. First there was a circle. Next a love heart. Then a rather impressive flatbread butterfly was rolled. Into the hot cast iron pan they went. Smoke alarm blaring. Silenced. Puff, flip, flop onto the plate.
The flatbreads were shared and torn, hands to bread to oil, dipped and scooped and brought to lips. You could taste the love.
We had made and broken bread together. Bread that became a vessel for connection; collecting the oil and connecting us to my friend’s whānau, their labour of love, into our puku and manawa.
Bread has united us as humans since the dawn of time (or at least since 10,000 BC, according to wikipedia lol). It’s not a new concept. But in pondering this week’s newsletter, the thought of dipping that bread in that glorious olive oil had me thinking a lot about bread. And it was then that I realised: when looking back on the week that had been, the most memorable connections I had made with others, had all featured bread!!
Bread is mahi
I went and met with Te Oranga Tonu Tanga, the Ōtepoti Māori Mental Health team, and as they welcomed me into their whare, one of their staff members had just picked up a freshly baked loaf of sourdough from Yours - a worker-owned and managed café/venue that imagines a better food system and provides space for radical action, music, art and cooperation (and who make daily bread they sell for koha - bread as community). Sharing parāoa together was something simple, that somehow felt really special.
Bread is whānau
One of the neat things about being in Ōtepoti, is that after years away in the North Island I now live pretty close to my Dad, which means getting to spend Father’s Day together (ps I hope all the fathers reading this had a cracker of a day). My Dad’s been wanting to take me on a road trip through the Nenthorn Valley for a couple of months now - even Beau the greyhound had been there with him before me! - so with the sun shining, we went for a father-son drive together. The ute weaved through the undulating tussock-soaked hills, scattered with impressive rock formations. Schist, dust, gusts and golden views. Not another car in sight for 70km, the area really is a hidden gem of East Otago (and only 45 minutes north of Dunedin). After panoramic views we found ourselves at Macraes (my first time in adult memory visiting here), famous for its gold and mining history. And with the dogs free to run around at a nearby reserve, we found a table and set up for a picnic lunch under the mightily impressive Haast Eagle Sculpture crafted by NZ sculptor Mark Hill.
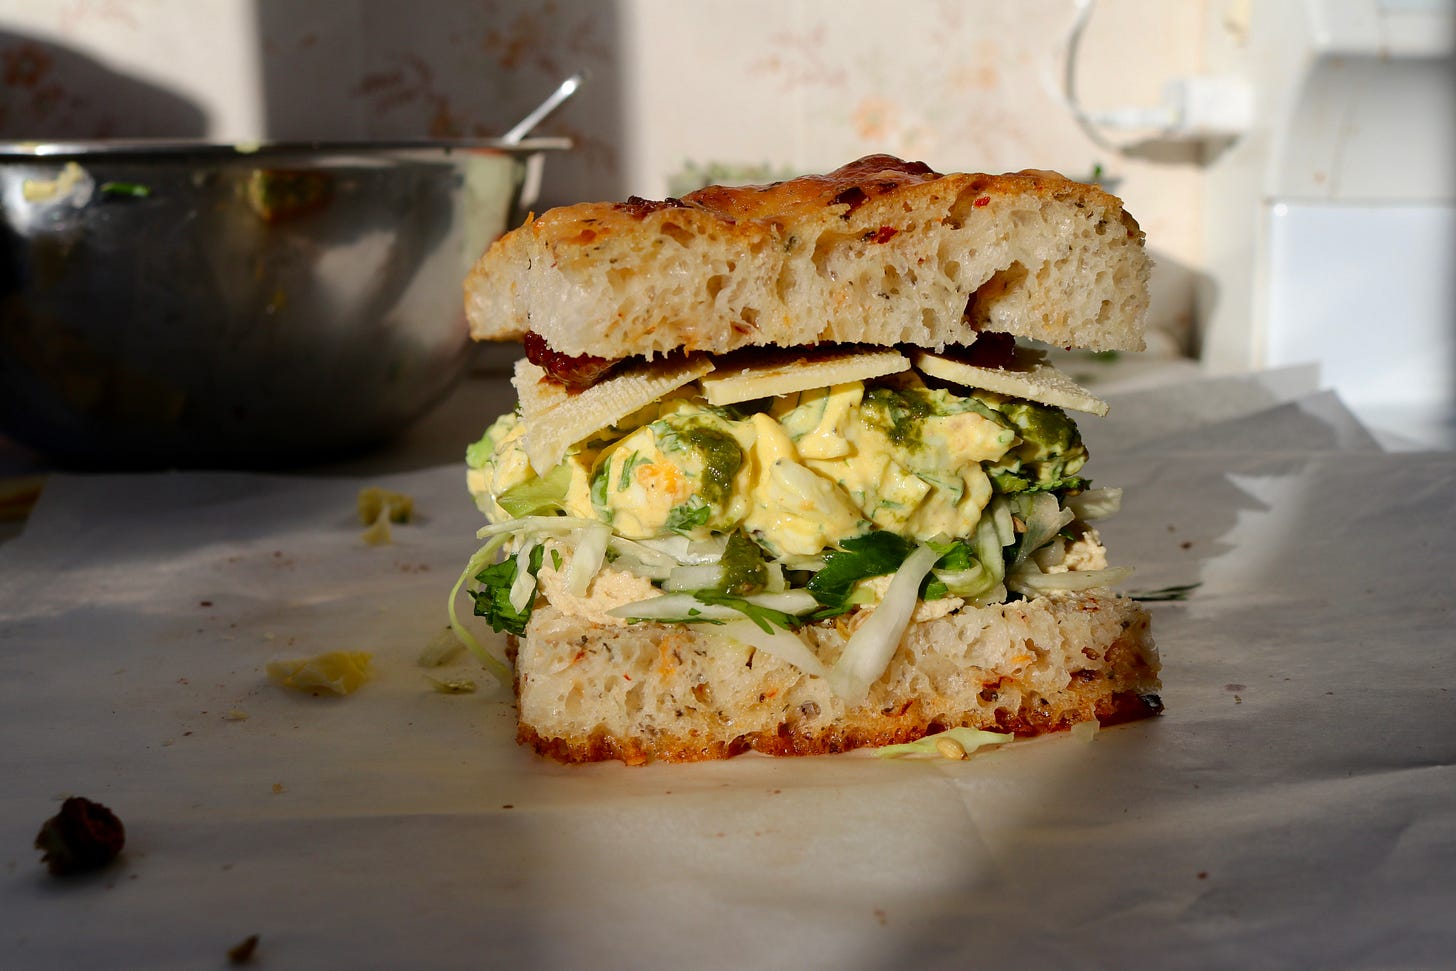
Dad was on thermos duty, and I had packed us some homemade vegan Belgium squares and some rather handsome-looking focaccia sandwiches. It’s not all that often I get to spend a whole day one-on-one with my Dad, and eating bread I had made, together, under the watchful eye of the Haast Eagle, dogs running around at our feet, was rather meaningful. And of course, then finished off with a beer at the Macraes pub before making our journey home. These focaccia sandwiches are the inspiration for this week’s recipes.
Bread is community
The other absolute highlight of my week also very very much owes itself to the wonders of bread. A connection with a local Ōtepoti food lover and advocate for reducing food waste (that was formed when she came along to my event at the Dunedin Readers’ & Writers’ festival last year - I’m almost certain there would have been some bread involved in the festival back then too!!), led me to walk through the doors of the Dunedin Craft Distillers. Angela had the idea that I might be interested in seeing what this recent boutique start up was up to, and boy was she right.
The Dunedin Craft Distillers primarily produce gin. Do I like gin? I don’t mind it, but it’s not my top drink of choice. So why was she so insistent that I needed to see what these gin-makers were up to?
Well, Dunedin Craft Distillers are no ordinary distillery. To quote their website: Dunedin Craft Distillers is the first distillery in Aotearoa and one of only a handful worldwide, to produce botanical spirits from surplus bread and bakery products that would otherwise go to landfill.
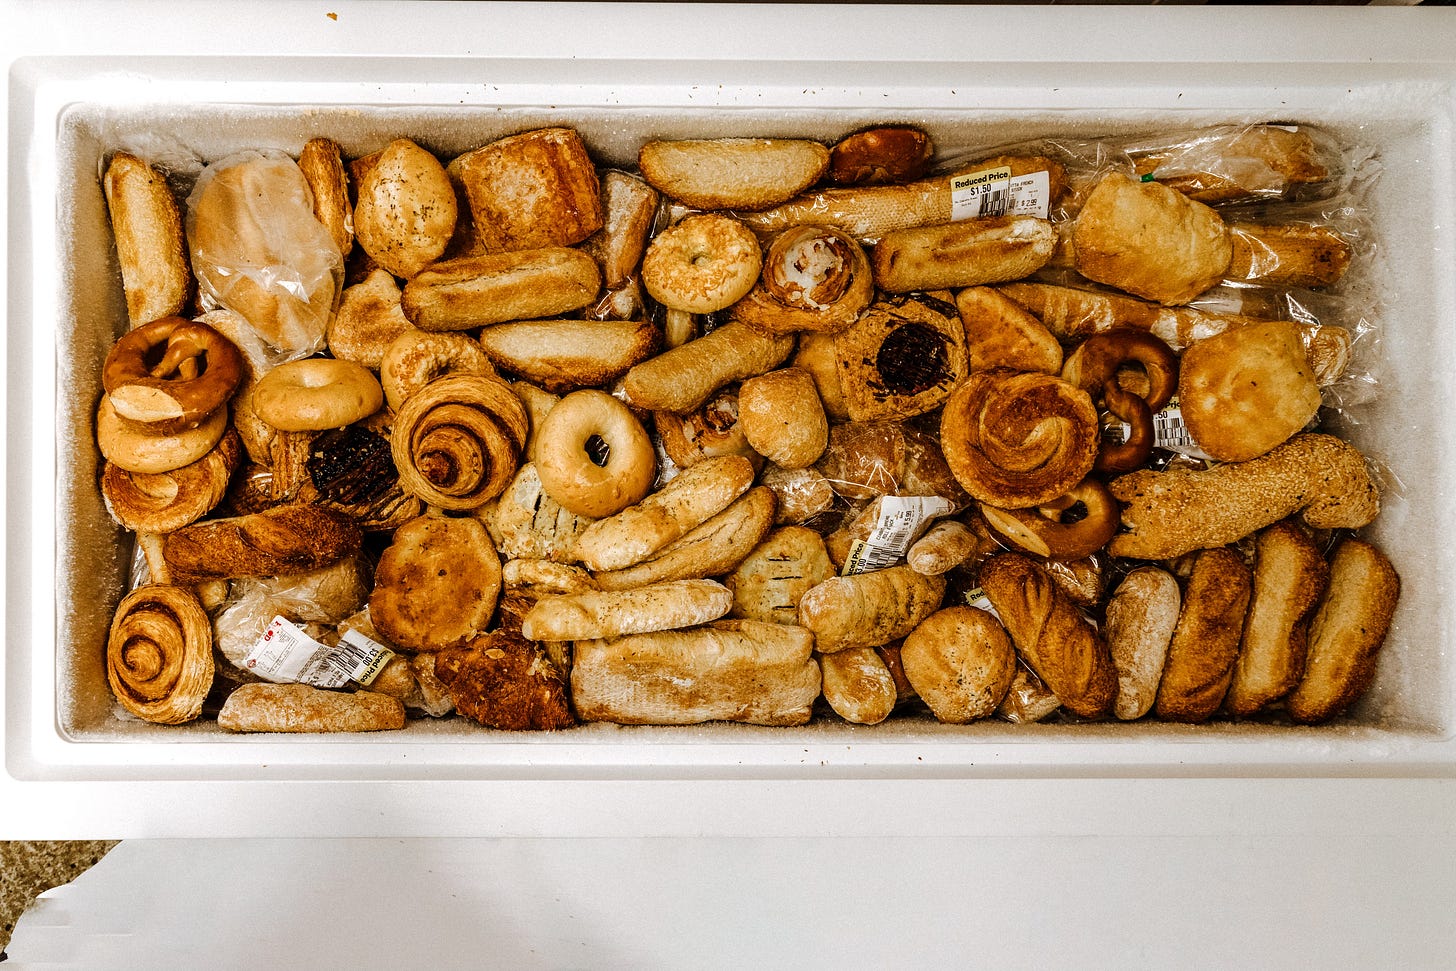
That’s right. Two ladies saw an issue (bread waste), and with a little bit of crazy and a lot of kiwi ingenuity, are now turning surplus bread (whatever KiwiHarvest is unable to give away to those in need) into award-winning gin.
It was such a privilege to have Jenny McDonald, one of the founders of the distillery, to talk me through their set up, the history of the business and the process of turning bread into gin. I’m not going to even pretend to be able to explain the intricacies of their methodology, but essentially bread is mashed and fermented, then distilled and and filtered to form a base ethanol that is the foundation of their gins (and limoncello!). It’s an intensive process that many NZ gin producers bypass by purchasing cheap imported ethanol, that is often produced without sustainability or the planet in mind. The ethos of Dunedin Craft Distillers is quite the opposite. From the bread they start their process with, to the recycling of water and heat used in the production process, to the packaging of their gins, sustainability is at the forefront of their business. And I can confirm, the gins are blimmin’ delicious (and the awards prove it!).
Unsurprisingly, because this is a grassroots business, its beginnings have relied heavily on the generosity of the community, from locals in the industry who have helped with set up and advice, to the residents and restaurants who have supported the product. At present, they are crowdfunding for a new mash kettle, to reduce the process for each batch of bread-based mash from three days to one, with the goal of increasing production to turn at least 18 tonnes of food waste into spirits annually and establish their business on a sustainable growth path. They have launched a PledgeMe campaign, where gin and other products can be purchased to support the continuation of their business - if you’re a fan of gin and the ethos of their sustainable business model, have a look and support their cause!
Once again, the power of bread.
Best of the season this fortnight (NZ):
Citrus - late lemons, grapefruit, oranges
Last of the yams
Avocados
Early asparagus
Last of the leeks
Carrots
Brassicas (broccoli, caulis, cabbages)
Hardy greens - cavolo nero, silver beet, kale
Celery
Mushrooms
Spinach
Celeriac
Brain food:
checkout this video of Dunedin Craft Distillers on Seven Sharp recently
the most delicious homegrown olive oil - a perfect gift for loved ones
why stick with one type of bread - some recipe inspiration for the bread-venturous
With all that being said about the marvel of bread, most of all, next time you’re eating that slice of glutinous goodness, enjoy it. Every crumb.
Be sure to scroll down for some killer recipes this week, based around the rather delicious Father’s Day focaccia - including the bread itself, a creamy hummus, quick egg filling and speedy coriander chutney.
I’ll leave you with this famous quote from Robert Browning (English poet & playwright) before I go: “If thou tastest a crust of bread, thou tastest all the stars and all the heavens.”
Much love,
Alby xx
Father’s Day Focaccia
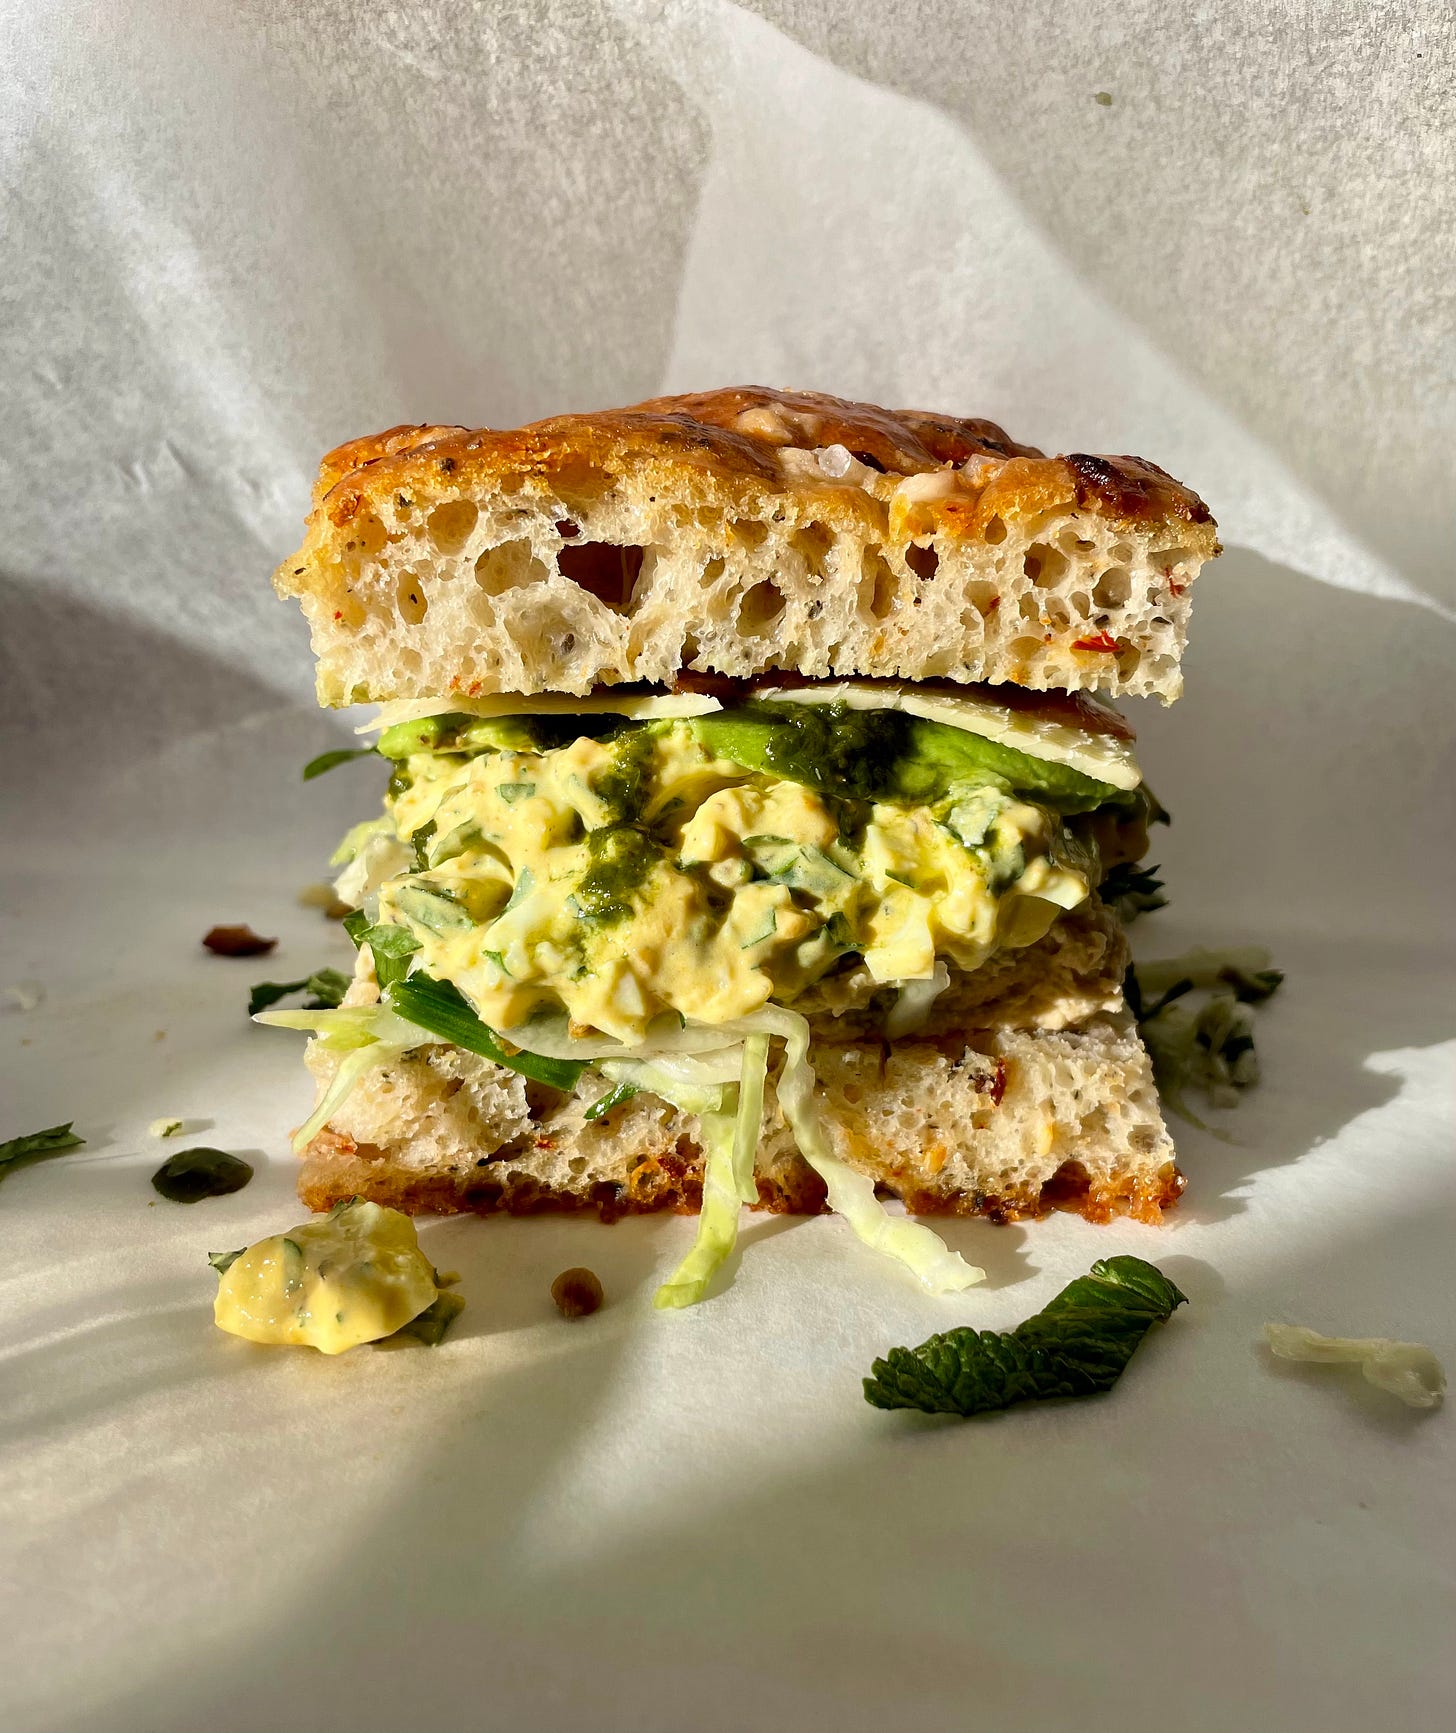
Easy homemade bubbly bread. Dreamy hummus. Zingy slaw for crunch. Creamy egg filling. Avo. Tasty. Fresh herb sauce. Sweet & spicy chutney. YUM!
Total Time: 2 hours
filling makes enough for 2-4 focaccia sandwiches
Cost Estimate: very difficult to estimate due to the different components, apologies
Ingredients
Quick slaw
2 tsp coriander seeds
100g daikon or radishes, sliced into thin rounds with a mandolin
100g thinly shredded cabbage
1 handful celery leaves, shredded (optional)
1 large handful coriander leaves, roughly chopped
1 large handful mint leaves, roughly chopped
juice of 1 lemon
1 tsp maple syrup
¼ tsp sea salt
Egg filling
6 eggs
3 tbsp sour cream
1 tbsp warm water
¼ tsp Dijon mustard
⅓ tsp curry powder
1 large handful flat-leaf parsley leaves, finely chopped
sea salt, to taste
cracked black pepper, to taste
Additional ingredients
Easy overnight focaccia (adapted from Good Vibes, see recipe below)
Basic hummus (see recipe below)
Speedy green sauce (see recipe below)
sliced avocado
tasty cheese, sliced
Tomato, date & tamarind chutney (recipe on pg 220 of Good Vibes), or any sweet/spicy chutney
Method
First make the slaw to allow the cabbage to soften a little. Toast the coriander seeds in a small pan over medium heat until fragrant and toasted. Transfer to a mortar and pestle, lightly crush, then transfer to a medium bowl. Add the remaining ingredients and toss through to combine, massaging the lemon juice into the cabbage and daikon; set aside.
For the egg filling, bring a medium-large saucepan of water to the boil. Once bubbling vigorously, carefully lower the eggs into the boiling water one at a time (I do this with a large spoon). Reduce the heat so at a gentle boil and cook for about 7-8 minutes. This should be the right amount of time for soft-set yolks. Immediately transfer the eggs to a large bowl of iced water to stop them cooking. Once cool enough to handle, peel off the shells. Roughly chop the eggs and add to a medium bowl. In a mug, whisk together the sour cream, warm water, mustard and curry powder. Add to the eggs, along with the chopped parsley. Gently toss through the eggs and season to taste with salt and pepper.
To assemble the focaccia sandwiches, slice a large square (about 13 x 13cm) of focaccia in half for each sandwich. Spread some of the hummus on the base of the focaccia. Top with a handful of the slaw, followed by the egg filling. Next drizzle with some of the speedy green sauce, and arrange some sliced avocado and tasty cheese on top. Spread a generous amount of chutney onto the top half of the focaccia and sandwich on top to enclose the filling.
If wrapping the focaccia to eat at a picnic, assemble each focaccia sandwich on a large piece of baking paper. Once assembled, bring the long sides of baking paper up to meet above the focaccia and roll/fold them together downwards to enclose the focaccia. Fold the ends of the baking paper like a Christmas present and tuck underneath. Cut through the baking paper/sandwich in half (see pictured above), leaving the baking paper underneath the sandwich intact.
Alby’s Advice:
Because there are a lot of components don’t go overboard with each part of the filling - but equally make sure you’ve got a good amount/balance of all the components in there.
Easy overnight focaccia (adapted from Good Vibes)
This is an adaptation of the overnight focaccia recipe in Good Vibes (pg 53). No, it doesn’t compare to a 3-day focaccia, but if you’re wanting a simple, tasty, bubbly focaccia that requires very little effort, this ticks all the boxes.
Hands-on Time: 10 minutes
Total Time: 3 hours (+ overnight proving)
makes 1 large rectangular loaf
Cost Estimate: $2.50
Ingredients
500g high grade flour
1 sachet (8g) instant dried yeast
10g sea salt
410ml cold water
80ml olive oil, plus extra for drizzling
4 cloves garlic, peeled and finely chopped
coarse sea salt
Method
To make your focaccia dough, place the flour, yeast, and salt in a large bowl, ensuring the salt is not touching the yeast. Pour in the water and using your hands, mix to form a relatively wet dough (no kneading is required). Add 40ml olive oil (plus any additional dough ingredients, see note below - e.g. dried herbs, chilli flakes, chopped olives etc.) and mix through until well combined and evenly incorporated. Cover the bowl with cling film and refrigerate overnight (for a minimum of 12 hours and up to 24 hours).
Shape the focaccia. Generously oil a large rectangular baking tin about 33cm x 23cm) with olive oil. Remove your dough from the refrigerator and bring the edges into the centre to deflate the dough. Tip the dough into the oiled baking tin, folded side underneath, and using your hands, press out the corners of the dough, gently stretching to cover most of the base of the tin. Cover with cling film and leave in a warm place for about 2 1/2 hours (will depend on the temperature and humidity of the space) until bubbly, wobbly, and doubled in size - it should have mostly filled the tin.
While the dough is proving, mix the remaining 40ml of olive oil and chopped garlic in a small bowl. Set aside to infuse for 2 hours.
Preheat the oven to 200°C fan-forced (or 220°C conventional).
To bake the focaccia, drizzle the garlic oil (including all the garlic) evenly over the dough. Use your fingers to create dimples all over the loaf, reaching the bottom of the tin so that the oil pools in them (the dough will bounce back a little so you are left with dimples rather than holes). Sprinkle generously with coarse sea salt and bake for about 30 minutes until golden brown and cooked through. Remove from the oven, drizzle with extra olive oil, and carefully remove from the tin. Serve warm or at room temperature.
Alby’s Advice:
Allow to cool to room temperature if using for sandwiches. Wrap with clingfilm and place in an airtight container for storage. It can be stored at room temperature or in the refrigerator if desired. It also freezes relatively well.
I highly recommend adding some flavour additions to the bread dough. My favourite is to add 1 tsp dried basil and 1 tsp chilli flakes (as in the focaccia pictured above), or you could easily add other dried herbs, chopped sun-dried tomatoes or olives etc.
Basic hummus
This is an excellent basic hummus, made with canned chickpeas, for when you need hummus on demand. The secret is heating the chickpeas so they’re nice and soft when blitzed - resulting in a much smoother hummus. You can easily jazz it up with extra spices, blitzed roasted vegetables, chopped chilli or herbs etc. Make it your own!
Ingredients
2x 400g cans chickpeas, drained
1 tsp sea salt, plus extra to taste
150g tahini
3 cloves garlic, finely chopped
3 ice cubes
½ tsp ground cumin
juice of ½ - 1 lemon
sea salt, to taste
Method
If you want a really smooth hummus, place the drained chickpeas in a tea towels and rub the chickpeas to release the skins. Carefully remove the skins and discard (this takes a while, but is worth it for a really smooth hummus - you can easily skip this step if desired). Place the peeled chickpeas in a medium saucepan with 1 tsp salt. Add enough water to cover and place over high heat. Bring to the boil, then reduce the heat and gently simmer for 20 minutes.
Drain the chickpeas over a bowl, saving their cooking water (you will add some of this to your hummus). Place the drained chickpeas in a food processor, with the tahini, garlic, ice cubes, cumin, lemon juice (start with ½ lemon) and 4 tbsp of the reserved chickpea water. Blitz for a couple of minutes until really smooth. Season to taste with a little extra salt if needed, and add a little more lemon juice if more zing is desired. You can also add a little more chickpea water too, depending on how loose you wish the hummus to be.
Store in an airtight container in the refrigerator for up to 1 week. It will thicken in the fridge - just loosen with a little warm water when next using, if desired.
Speedy green sauce
This is a quick green herb chilli chutney, similar to that you might serve with samosa. It’s a great condiment to have on hand in the fridge for a quick flavour boost - I love drizzling it over avocado on toast, or for using in sandwiches, salads or drizzled over soups.
Ingredients
1 tsp coriander seeds
1 tsp cumin seeds
30g fresh coriander (stalks and leaves)
20g mint leaves
1-2 green chillies (based on heat preference)
4 cloves garlic
finely grated zest and juice of 1 lemon
sea salt, to taste
Method
Toast the coriander and cumin seeds in a small pan over medium heat until fragrant. Add to a tall container or bowl, along with the coriander, mint, chillies, garlic, lemon zest and juice. Gradually add some water, a couple of tablespoons at a time, blitzing with a stick blender until a smooth, relatively thin-yet-spoonable green sauce is reached (about 1/2 - 3/4 cup of water is usually about right). Season to taste with sea salt. Transfer to a jar and store in the fridge for up to 10 days.


